Published 6 Oct 2023
Comparing Email Sending Options
Business
Introduction
Email is a fundamental tool for communication. Whether you are conducting business negotiations, marketing a product, or even receiving automated notifications, email is at the core of these interactions. However, not all email-sending methods are created equal and each method has its strengths and weaknesses, and the right choice depends on your unique needs. In this blog, we'll explore the different options mentioned below and make an informed choice based on a project's specific needs.
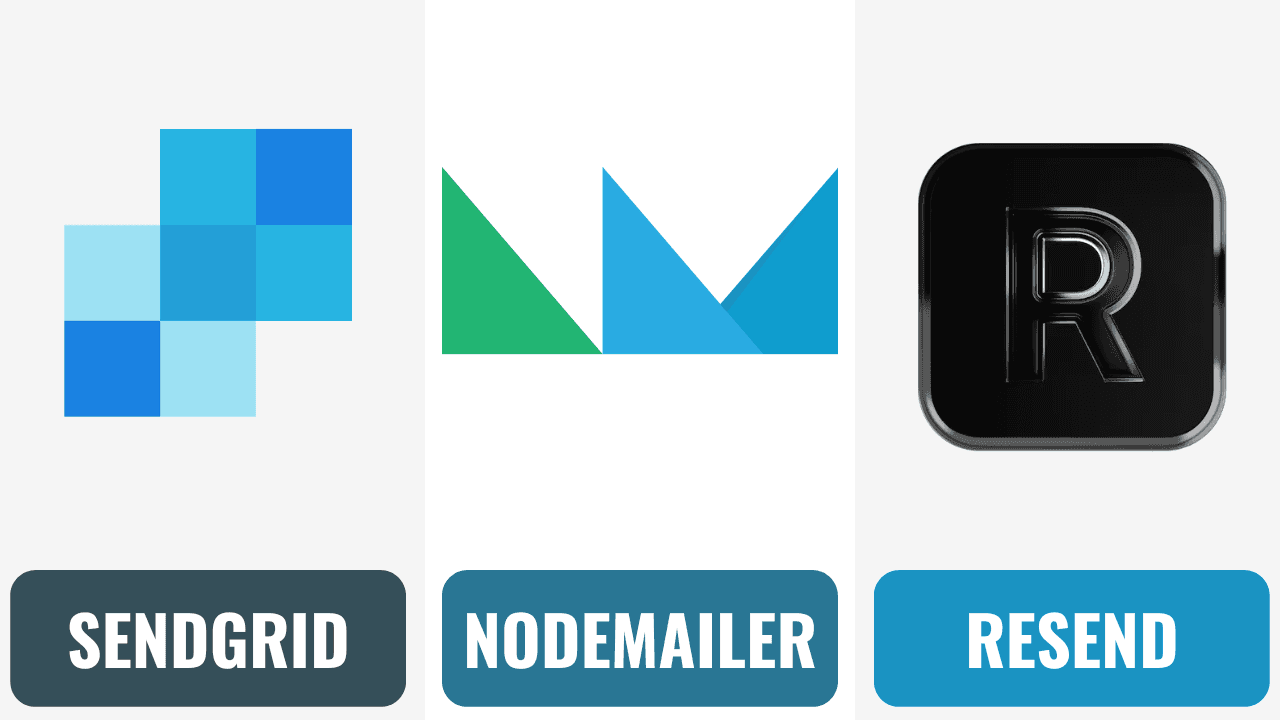
- Nodemailer
- SendGrid
- Resend
React Email
According to Yes Lifecycle Marketing, 2019, the average email open rate is 20.81%. So, when an email is sent from your organization, the first thing to ensure is that it doesn't land in the spam folder. For this, the services mentioned above such as Resend, and SendGrid are used.
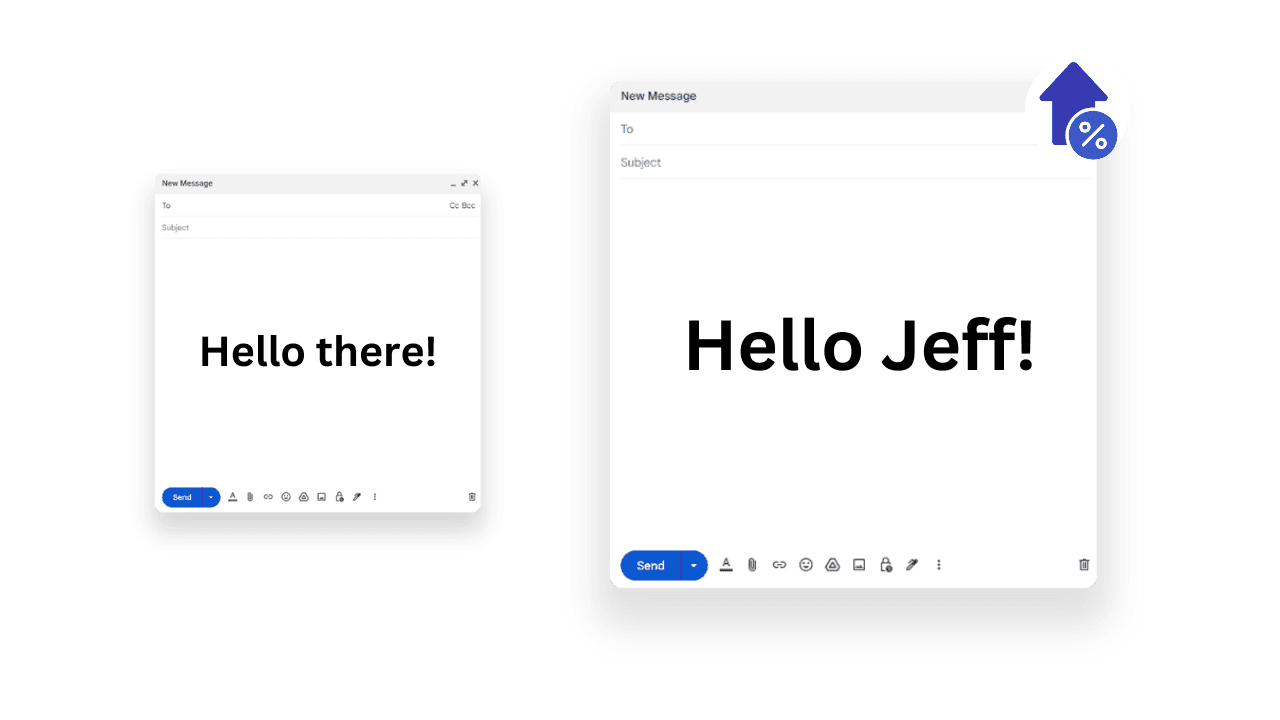
Personalization is the key along with an appropriate preview and subject line to attract the customer's attention and stand out amongst the other mails in the inbox. Once you start personalizing your email, you will see the incredible impact it has. Emails with personalized subject lines generate 50% higher open rates.
So, a great email marketing tip would be to customize your greeting and subject line to include individual names when you send out emails. You can also try personalizing your emails with the company’s name, industry, or topic of interest.
React Email provides a set of unstyled components through which you can personalize the email being sent. This allows developers to build emails using a component-based architecture similar to React web apps. It aims to modernize the process of email development by leveraging React's syntax, TypeScript, and integrating with modern frontend tools. This provides a better developer experience compared to traditional solutions and enables developers to build beautiful, scalable email templates. React email also consists of example templates that can be tweaked as per requirements.
Components
React email provides various components that are similar to the components of HTML which makes it easier due to the familiarity with the syntax. The list of the components is provided here on the official website. You can either install a specific component or install all the components at once using the following command:
npm install @react-email/componentsThe template of your email can be designed and modified based on the content and requirements of the mail. Let us consider a simple email thanking a customer for using our service.
import {
  Body,
  Container,
  Column,
  Head,
  Html,
  Img,
  Link,
  Preview,
  Row,
  Section,
  Text,
} from '@react-email/components';
import * as React from 'react';

interface _91BytesThankYouEmailProps {
  userName?: string;
  userMail?:string;
}

const baseUrl = process.env.VERCEL_URL ?
process.env.VERCEL_URL : '/static';

export const _91BytesThankYouEmail =({ userName = 'Customer' , userMail}:
_91BytesThankYouEmailProps) => {
  return (
    <Html>
      <Head />
      <Preview>Thank you for using our service.</Preview>
      <Body style={main}>
        <Container style={container}>
          <Section style={logo}>
            <Img width={114} src={`${baseUrl}/static/91bytes-logo.png`} />
          </Section>
          <Section style={sectionsBorders}>
            <Row>
              <Column style={sectionBorder} />
              <Column style={sectionCenter} />
              <Column style={sectionBorder} />
            </Row>
          </Section>
          <Section style={content}>
            <Text style={paragraph}>Hi {userName},</Text>
            <Text style={paragraph}>
              I hope this message finds you well. We wanted to take a moment to
              express our sincere gratitude for choosing our service.
              Your trust in us is greatly appreciated, and we are committed to
              continuously providing you with the best possible experience.
            </Text>
            <Text style={paragraph}>
              At 91Bytes, we strive to go above and beyond to meet your needs
              and exceed your expectations. Your satisfaction is our top
              priority, and we are constantly working to improve our services
              to ensure they align perfectly with your requirements.
            </Text>
            <Text style={paragraph}>
              Thank you,
              <br />
              91Bytes Support Team
            </Text>
          </Section>
        </Container>

        <Section style={footer}>
          <Row>
            <Column align="right" style={{ width: '50%', paddingRight: '8px' }}>
              <Img src={`${baseUrl}/static/91Bytes-icon-twitter.png`} />
            </Column>
            <Column align="left" style={{ width: '50%', paddingLeft: '8px' }}>
              <Img src={`${baseUrl}/static/91Bytes-icon-facebook.png`} />
            </Column>
          </Row>
          <Text style={{ textAlign: 'center', color: '#706a7b' }}>
            © 2023 91Bytes, All Rights Reserved <br />
          </Text>
        </Section>
      </Body>
    </Html>
  );
};

export default _91BytesThankYouEmail;

const fontFamily = 'HelveticaNeue,Helvetica,Arial,sans-serif';

const main = {
  backgroundColor: '#efeef1',
  fontFamily,
};

const paragraph = {
  lineHeight: 1.5,
  fontSize: 14,
};

const container = {
  width: '580px',
  margin: '30px auto',
  backgroundColor: '#ffffff',
};

const footer = {
  width: '580px',
  margin: '0 auto',
};

const content = {
  padding: '5px 50px 10px 60px',
};

const logo = {
  display: 'flex',
  justifyContent: 'center',
  alingItems: 'center',
  padding: 30,
};

const sectionsBorders = {
  width: '100%',
  display: 'flex',
};

const sectionBorder = {
  borderBottom: '1px solid rgb(238,238,238)',
  width: '249px',
};

const sectionCenter = {
  borderBottom: '1px solid rgb(145,71,255)',
  width: '102px',
};

const link = {
  textDecoration: 'underline',
};
In the above code, we define a TypeScript interface, _91BytesThankYouEmailProps, with a userName and userMail fields. This interface specifies the structure of the props that our _91BytesThankYouEmail component is expected to receive. If no user name is provided when the email is sent, the variable userName is initialized with a default value of “Customer”.
Render
To use React Email with any email service provider, we first need to convert the components made with React into an HTML string. This is done using the render utility. To render it into HTML form, first install it using the command:
npm install @react-email/render -EThe component can be rendered using:
const emailHtml = render(
    <_91BytesThankYouEmail
    userName={formData.name}
    userMail={formData.email}/>,
    {pretty:true}
)
Service Providers
Now that we have the email template and it is rendered, we can start sending the email through a service provider. The service providers that can be integrated with React email are Resend, SendGrid, and Nodemailer. All these service providers use their own SMTP servers. Let us know more about SMTP servers in detail.
SMTP servers
Behind the scenes, SMTP servers play a crucial role in ensuring that your emails are sent and received seamlessly. SMTP stands for Simple Mail Transfer Protocol, and an SMTP server is a specialized computer program or server responsible for sending, receiving, and routing emails between different email clients and servers.
How does it work?
SMTP servers follow a series of steps to deliver your email from sender to recipient:
- Initiation: The email journey begins when you compose a message in your email client (e.g., Gmail, Outlook, or Thunderbird) and hit the "Send" button. Your email client communicates with an SMTP server, provided by your email service provider (e.g., smtp.gmail.com for Gmail) or a custom SMTP server using a private domain.
- Address Verification: The SMTP server checks the recipient's email address to ensure it's valid and properly formatted. If the address is valid, the server proceeds to the next step.
- Relay to Recipient's Server: If the recipient's email address doesn't belong to the same email service provider, the SMTP server relays the email to the recipient's SMTP server. This step involves connecting to the recipient's server using DNS (Domain Name System) to find the recipient server's IP address.
- Message Delivery: The recipient's SMTP server receives the email and stores it temporarily in the recipient's mailbox.
- User Retrieval: The recipient's email client (e.g., Outlook, Thunderbird, or a webmail service) connects to the recipient's SMTP server to retrieve the email.
- Message Read: The recipient reads the email through their email client, and the communication loop is complete.
Creating your own SMTP server can be a complex process and we can use the existing SMTP servers for our usage.
Nodemailer
Nodemailer is a popular and widely used Node.js library for sending emails. It's flexible, easy to use, and supports various email providers and protocols. With Nodemailer, you can send text emails, HTML emails, attachments, and more, making it a versatile choice for both simple and complex email-sending tasks.
Why use Nodemailer?
Before diving into how to use Nodemailer, let's understand why it's a popular choice for sending emails:
- Node.js Ecosystem: If you're already using Node.js for your backend development, Nodemailer seamlessly integrates into your stack, making it a natural choice.
- Easy to Set Up: Nodemailer is easy to set up and configure, even for beginners. It provides a straightforward way to send emails with minimal effort.
- Supports Multiple Email Services: Nodemailer supports various email providers, including Gmail, Outlook, Yahoo, and custom SMTP servers. This flexibility allows you to choose the email service that best fits your needs.
- Customization: You can customize the content, attachments, and headers of your emails, giving you full control over the email's appearance and behavior.
- Promises and Async/Await: Nodemailer supports Promises and async/await, making it easy to handle asynchronous email-sending tasks.
Now, let's get into the practical details of using Nodemailer.
Setting up
To use Nodemailer, you'll need to install it as a dependency in your Node.js project. Run the following command in the terminal:
npm install nodemailerNodemailer requires some configuration to work correctly. Here's an example configuration for sending emails through a Gmail account:
const nodemailer = require('nodemailer');

// Create a transporter using Gmail SMTP
const transporter = nodemailer.createTransport({
  host: 'smtp.gmail.com', //it can be a custom smtp server ãlso
  port: 587,
  secure: false,
  auth: {
      user: 'yourMail@gmail.com', // Replace with your Gmail address
      pass: 'yourAppPassword' // Replace with your Gmail password or app-specific password
  },
});
Replace 'yourMail@gmail.com' and 'yourAppPassword' with your Gmail email address and app-specific password. Note that using your email password directly in your code isn't a secure practice for production applications. In production, you should use environment variables to store sensitive information securely.
Sending email
Once you've configured Nodemailer, sending an email is straightforward. Here's a basic example:
// Define the email content
const mailOptions = {
  from: 'your-email@gmail.com',
  to: 'recipient-email@example.com',
  subject: 'Hello from Nodemailer',
  text: 'This is a test email sent from Nodemailer.',
};

// Send the email
transporter.sendMail(mailOptions, (error, info) => {
  if (error) {
    console.error('Error sending email:', error);
  } else {
    console.log('Email sent:', info.response);
  }
});
In this example:
- mailOptions contains the email's details, including the sender, recipient, subject, and text content.
- transporter.sendMail sends the email. It takes the mailOptions and a callback function that handles errors and provides information about the sent email.
You can customize the email's content by modifying the mailOptions object. Nodemailer also supports sending HTML content, attachments, and more advanced features.
In our example, we will also be sending an email from the node server. To do this, expose an API endpoint from your Node server that your React app can call to send emails when a form is submitted. The data sent from the React app consists of HTML and JSON data. The HTML data consists of the email template which is denoted by emailHtml and the JSON data consists of the receiver's details such as name and email ID denoted by jsonData.
const express = require('express');
const nodemailer = require('nodemailer');
const bodyParser = require('body-parser');
const cors = require('cors');

const app = express();
app.use(cors({ origin: 'server-url' }));
// Parse incoming form data
app.use(bodyParser.json());
app.use(bodyParser.text({ type: 'text/html' }));


app.get('/send-email', (req, res) => {
    res.send("hello send email")
});

// Handle form submission
app.post('/send-email', (req, res) => {
    const emailHtml = req.body.emailHtml; //email HTML
    const jsonData = JSON.parse(req.body.jsonContent); //receiver's details

    // Process the HTML content
    // Create a Nodemailer transporter
    const transporter = nodemailer.createTransport({
        host: 'smtp.gmail.com',
        port: 587,
        secure: false,
        auth: {
            user: 'yourMail@gmail.com', // Replace with your Gmail address
            pass: 'yourAppPassword' // Replace with your Gmail password or app-specific password
        }
    });

    // Email data
    const mailOptions = {
        from: 'your-email@gmail.com',
        to: jsonData.email, // Receiver's email address
        subject: 'Thank You',
        html: emailHtml,
    };

    // Send the email
    transporter.sendMail(mailOptions, function(error, info) {
        if (error) {
            console.error('Error sending email: ' + error);
            res.send('Error sending email. Please try again later.');
        } else {
            console.log('Email sent: ' + info.response);
            res.send('Thank you for your message! We will get back to you shortly.');
        }
    });
});

// Start the server
const port = process.env.PORT || 3000;
app.listen(port, () => {
    console.log(`Server is running on port ${port}`);
});
Here we are using the SMTP server provided by the gmail itself. You can integrate nodemailer with resend as well. If integrated with Resend, API_KEY of resend is used along with the SMTP server of resend.
SendGrid
SendGrid is an email delivery platform that offers a suite of tools and services designed to simplify email management and enhance deliverability. Founded in 2009, SendGrid has grown into one of the leading email delivery services, trusted by businesses and developers worldwide.
Key Features of SendGrid
- Reliable Email Delivery: SendGrid ensures that your emails reach recipients' inboxes consistently, minimizing the chances of your messages being marked as spam.
- Email API: SendGrid provides a user-friendly API that allows developers to integrate email sending and tracking functionality into their applications, websites, or services. This API is available in various programming languages.
- SMTP Service: SendGrid offers an SMTP (Simple Mail Transfer Protocol) service that allows developers to send emails using their favorite email clients or libraries while benefiting from SendGrid's deliverability features.
- Email Templates: You can create and manage email templates, making it easier to maintain a consistent brand identity in your email communications.
- Email Personalization: SendGrid enables you to personalize emails by including dynamic content and recipient-specific information, enhancing engagement with your audience.
- Analytics and Tracking: Gain insights into the performance of your email campaigns with detailed analytics, including open rates, click-through rates, and bounce rates.
Setting up
In your Node.js project directory, open a terminal and run the following command to install the SendGrid package:
npm install @sendgrid/mail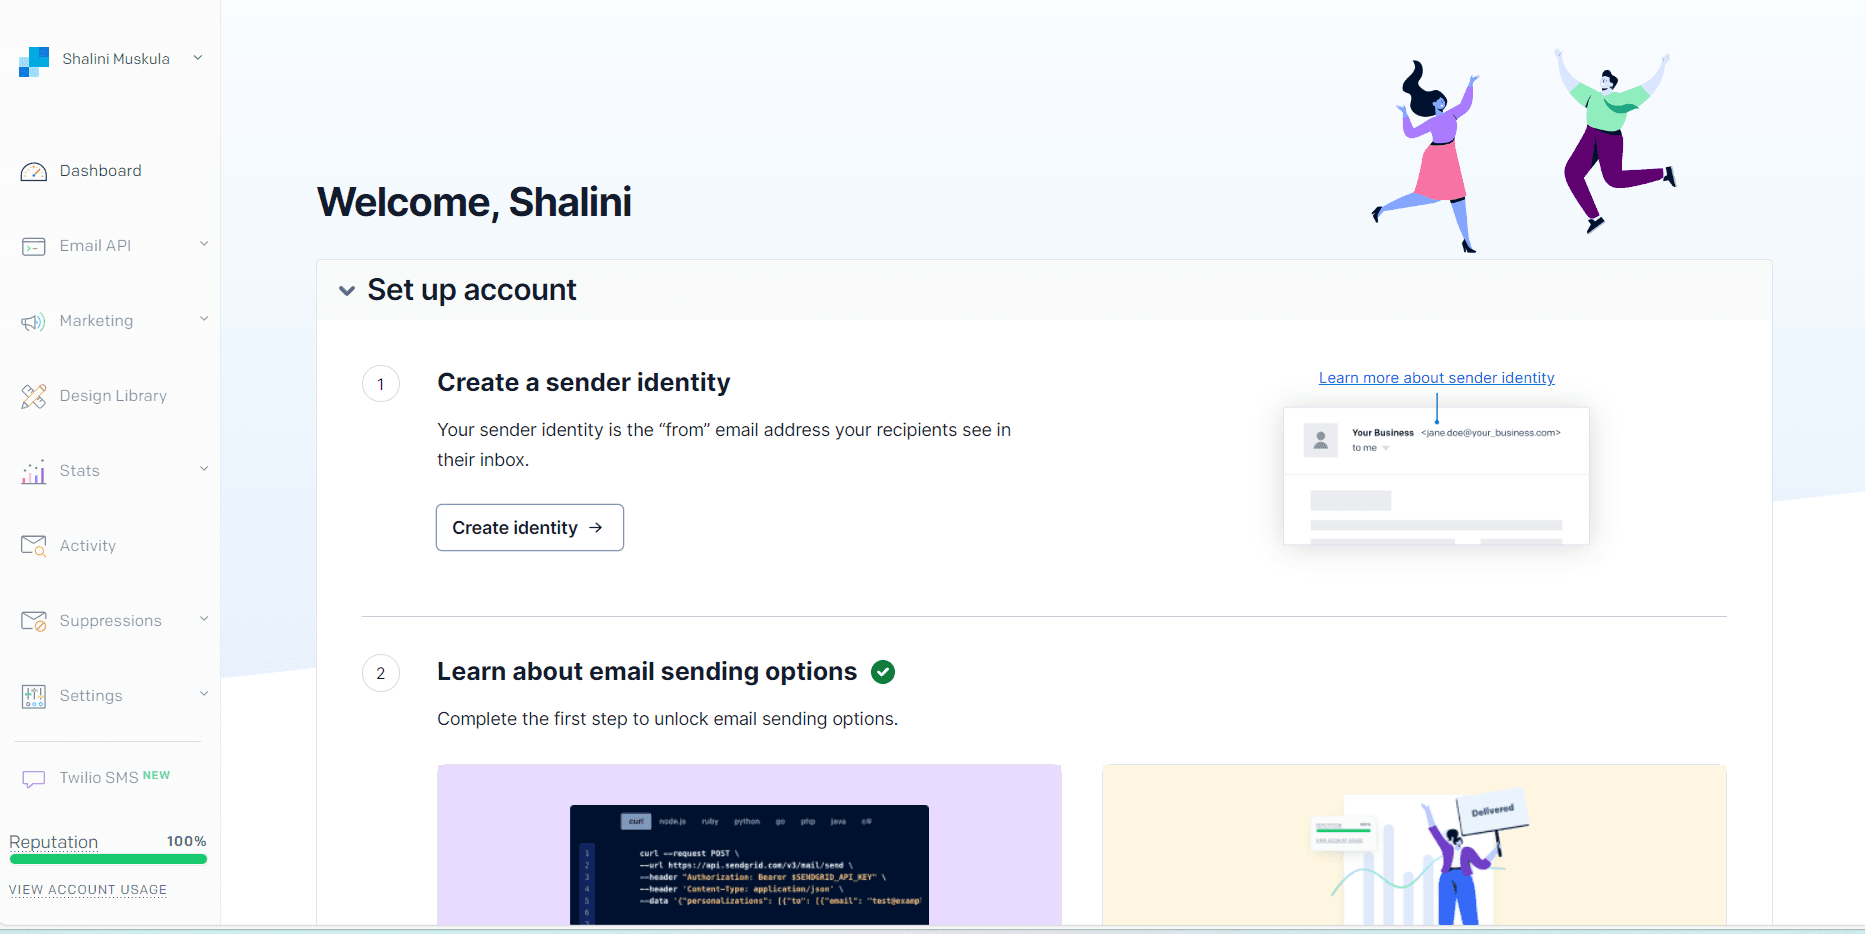
To use SendGrid, you need to create an account first. Head over to the website to create one. Then click on Create Identity. This is how the receivers will see the mail. Then fill in the details in the form.
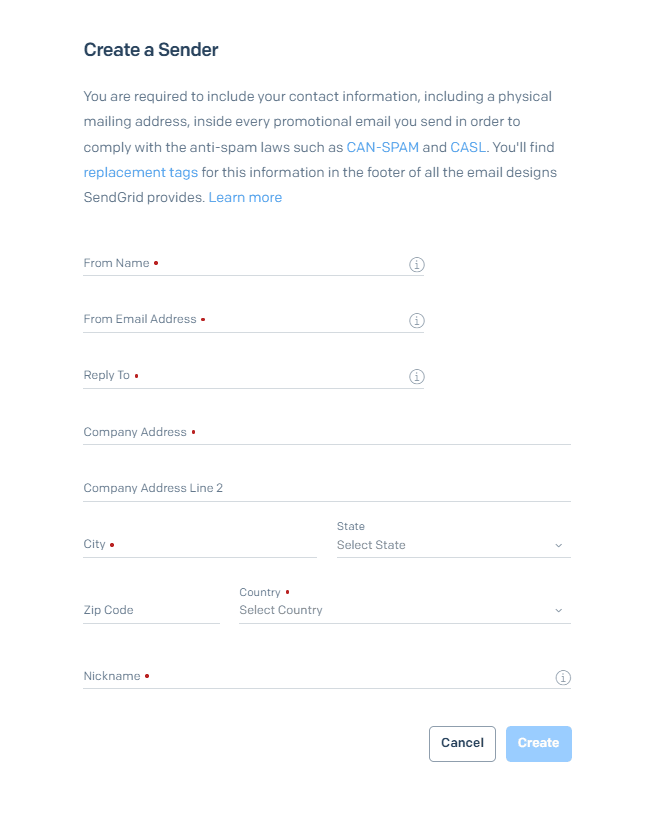
Click on create after filling out the form. Then verify the sender. You will receive an email to the email address mentioned in the from section in the form. You can verify by clicking on the verify Single Sender button. Once verification is done, head over to the API keys in the settings section and create the API key. Choose the permissions based on your requirements.
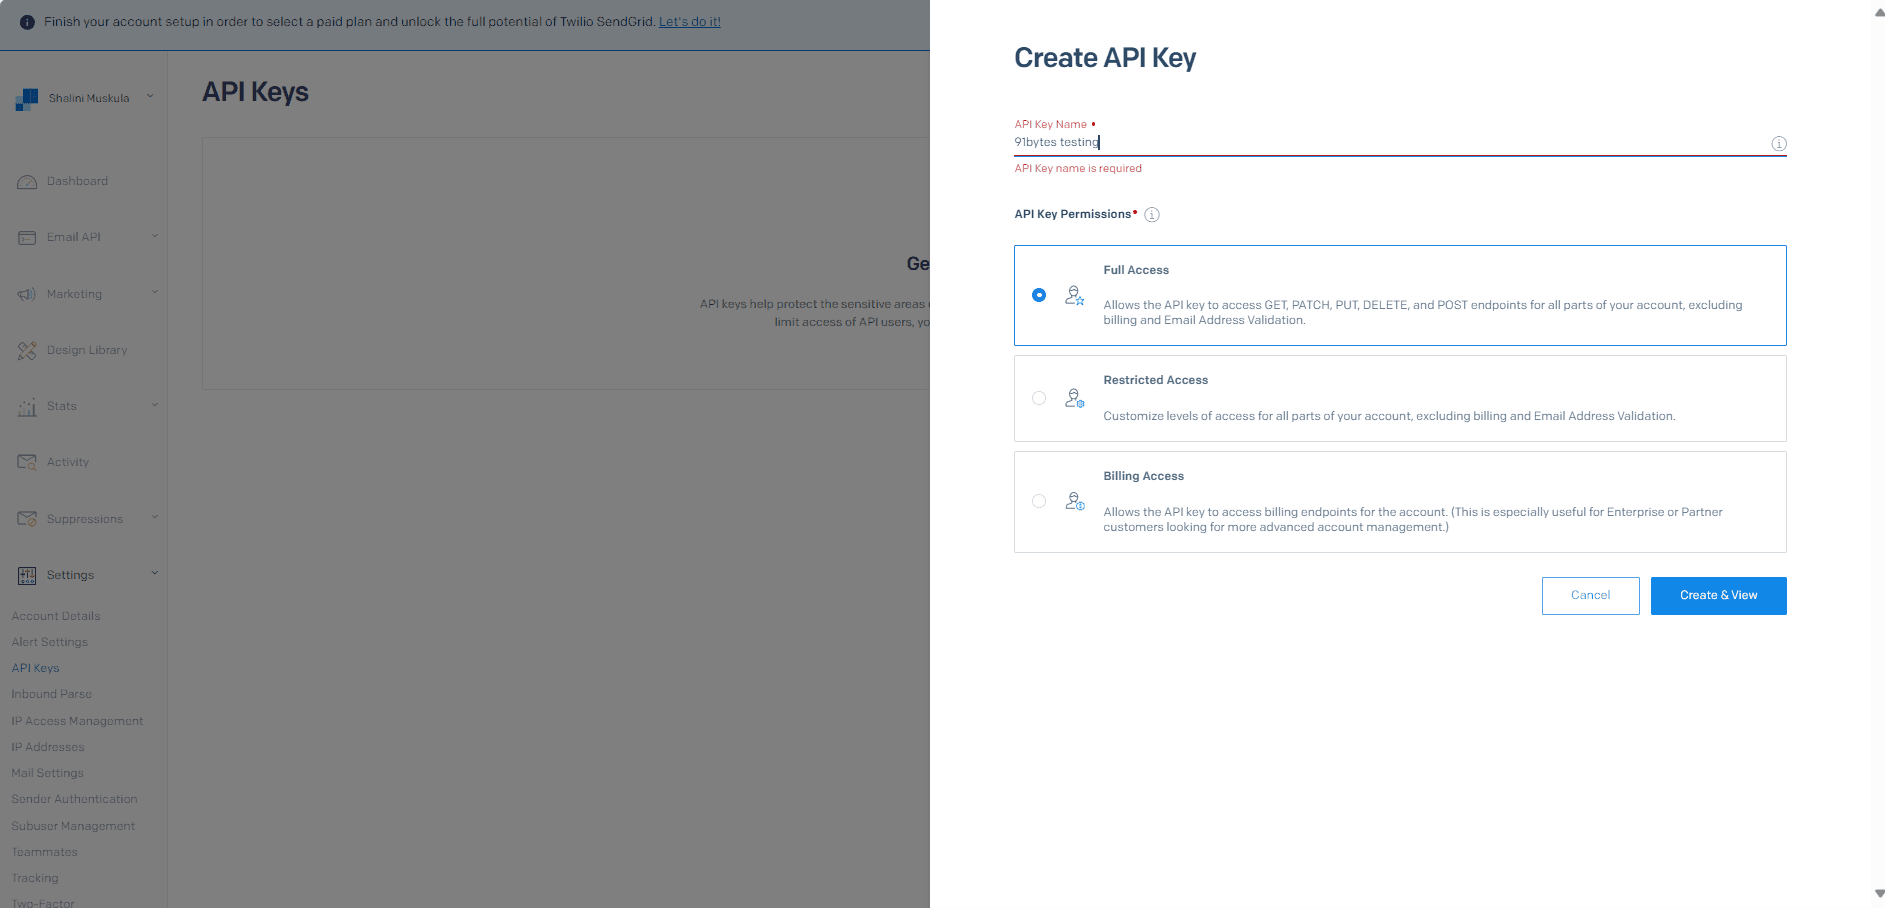
Copy the API key once you create it. Now you can send emails using this API key.
Sending Email
Add your API key to the env file. Let's send the Thank you mail using SendGrid.
const express = require('express');
const bodyParser = require('body-parser');
const resend_= require("resend");
const cors = require('cors');
const app = express();
const sgMail = require('@sendgrid/mail')

app.use(cors({ origin: 'http://localhost:3001' }));
// Parse incoming form data
app.use(bodyParser.json());
app.use(bodyParser.text({ type: 'text/html' }));

sgMail.setApiKey(process.env.SENDGRID_API_KEY)// add your api key to env file

app.get('/send-email', (req, res) => {
    res.send("hello send email")
});

// Handle form submission
app.post('/send-email', async(req, res) => {
    const emailHtml = (req.body.emailHtml);
    const userData = JSON.parse(req.body.jsonContent);
    console.log(jsonData);
      const msg = {
          to: userData.email, // Change to your recipient
          from: 'your-from-email@email.com', // From email address
          subject: 'Thank you',
          html: emailHtml,
      }
  sgMail
  .send(msg)
  .then((response) => {
    console.log(response[0].statusCode)
    console.log(response[0].headers)
  })
});


// Start the server
const port = process.env.PORT || 3000;
app.listen(port, () => {
    console.log(`Server is running on port ${port}`);
});
Resend
As we discussed before, one of the problems with sending marketing or business mail is the risk of the mail landing in the spam folder. Resend is an email service that prevents this from happening. It is quick and easy to set up. Similar to SendGrid, an API key is needed to send the mail. It can be integrated with Nodemailer too.
Let us continue with the Thank You email with Nodejs and Express being the server. We will be using the same email template that we created before.
Setting up
You can install resend with the following command:
npm install resendTo get the Resend API key, create a Resend account, click on Add and API key and copy the key as soon as you create it as it is only available once. You can check the emails sent and received in the Emails section.
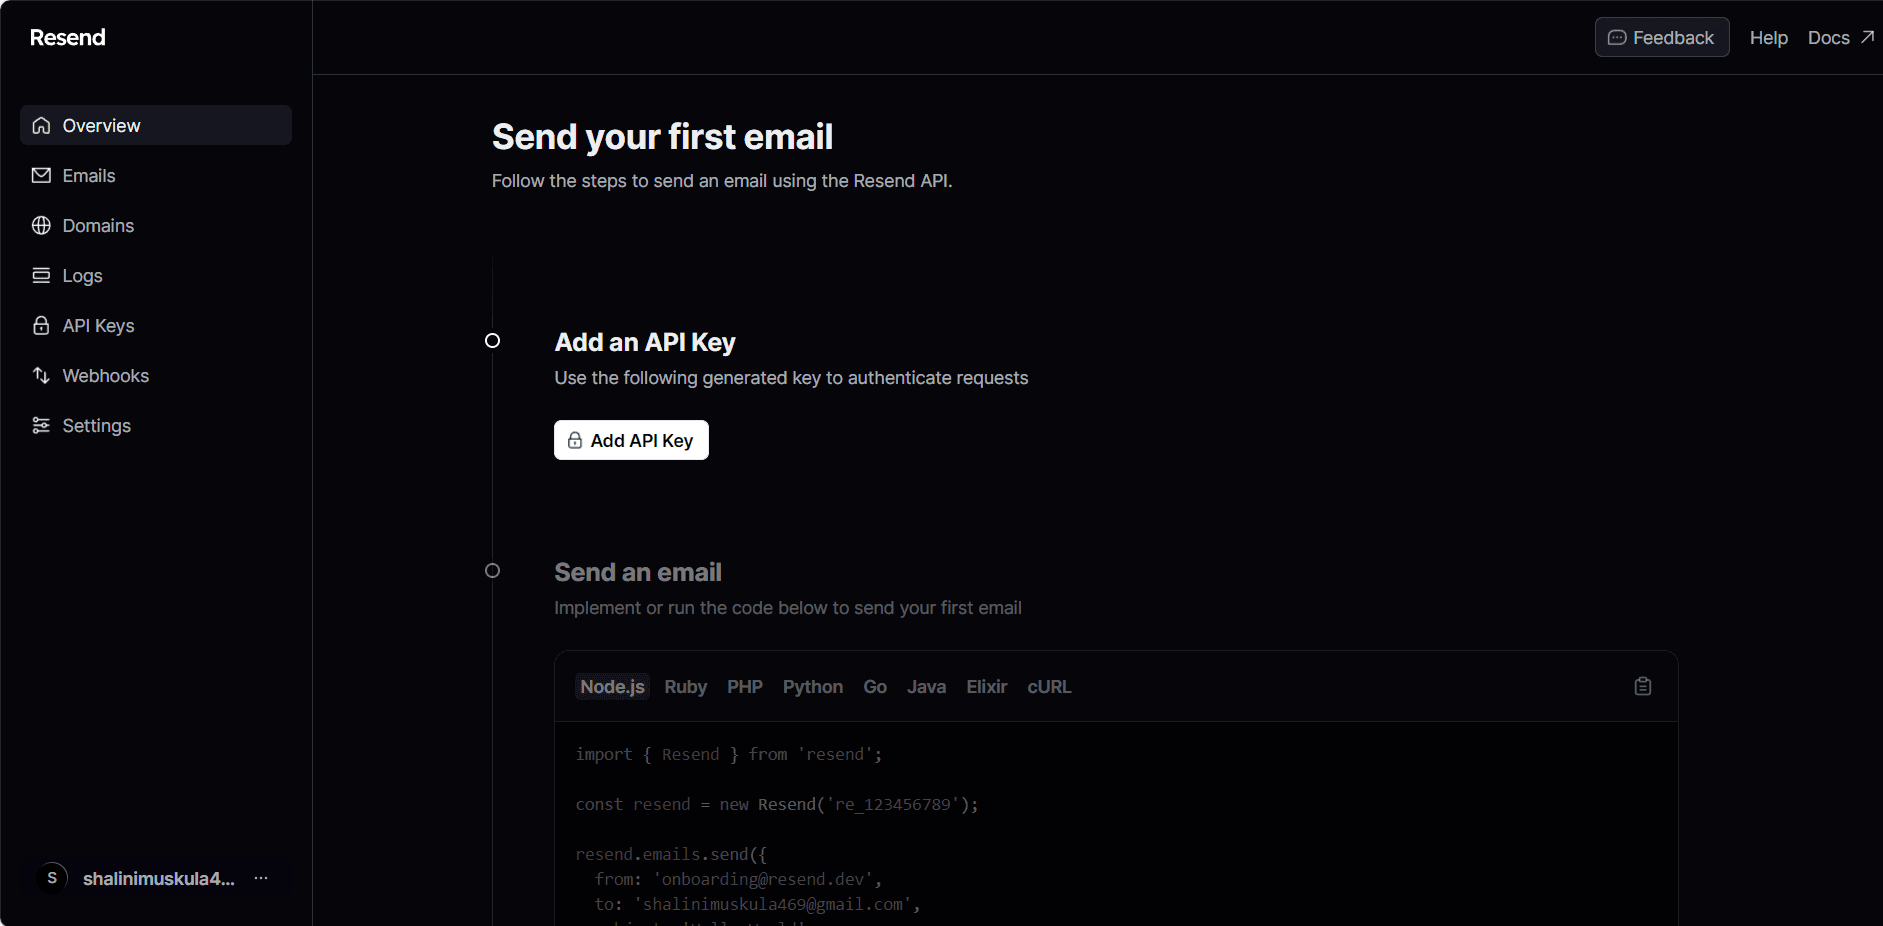
If you observe the email template, the from email address is mentioned as 'onboarding@resend.dev' can be used to send the testing mail but not during production. So, add your domain and verify the DNS to start sending emails.
Resend requires some configuration to work correctly. Here's an example configuration for sending emails:
const resend_= require("resend");
const resend = new resend_.Resend(process.env.RESEND_API_KEY);

const data = await resend.emails.send({
          from: 'sender-mail@your-domain.com',
          to: 'receiver-mail@example.com',
          subject: "Testing mail",
          html: emailHtml,
    });
Sending Email
Once you've configured Resend, sending an email is simple. Here's how we will be sending the Thank You mail.
const express = require('express');
const bodyParser = require('body-parser');
const resend_= require("resend");
const cors = require('cors');
const app = express();

app.use(cors({ origin: 'http://localhost:3001' }));

// Parse incoming form data
app.use(bodyParser.json());
app.use(bodyParser.text({ type: 'text/html' }));

// resend API key
const resend = new resend_.Resend(process.env.RESEND_API_KEY);

app.get('/send-email', (req, res) => {
    res.send("hello send email")
});

// Handle form submission
app.post('/send-email', async(req, res) => {
    const emailHtml = (req.body.emailHtml);
    const userData = JSON.parse(req.body.jsonContent);
    try{
      const data = await resend.emails.send({
          from: 'email1@example.com',
          to: userData.email,
          subject: "hello, " + userData.name,
          html: emailHtml,

    });
    res.status(200).json({ data });
  } catch (error) {
    res.status(500).json({ error });
  }
});


// Start the server
const port = process.env.PORT || 3000;
app.listen(port, () => {
    console.log(`Server is running on port ${port}`);
});
Always place your API keys in the env file. One of the key benefits of using an env file is the separation of configuration from the code. This means that sensitive information like API keys, database credentials, and other configuration settings are kept separate from the source code. This makes it easier to manage configuration settings and maintain security.
Comparison
- Nodemailer:
- Ease of Use: Nodemailer is easy to set up and configure, especially if you are already using Node.js.
- Customization: It offers great flexibility in customizing email content, attachments, and headers.
- Integration: It can be integrated with various email providers and protocols.
- Async/Await Support: Nodemailer supports async/await, making it easy to handle asynchronous email-sending tasks.
- Community: It has a large and active community, which means good support and a wide range of plugins.
- SendGrid:
- Reliability: SendGrid is known for its reliable email delivery, reducing the chances of emails landing in spam folders.
- Email API: It offers a user-friendly API for integrating email sending and tracking into applications.
- Email Templates: You can create and manage email templates for consistent branding.
- Email Personalization: SendGrid allows for dynamic content and recipient-specific information, improving engagement.
- Analytics: It provides detailed analytics for tracking email campaign performance.
- Resend:
- Anti-Spam: Resend focuses on preventing emails from landing in spam folders, a critical concern for email marketing.
- Easy Setup: It's quick and easy to set up, making it accessible for developers.
- Integration: Resend can be integrated with Nodemailer for added control over email content.
- DNS Verification: Requires DNS verification for your sending domain to improve email deliverability.
- Email History: It provides a history of sent and received emails for tracking.
Decision
The choice between Nodemailer, SendGrid, and Resend depends on your specific needs and priorities:
- Nodemailer: Choose Nodemailer if you prefer a highly customizable solution, already use Node.js, and want full control over your email-sending process.
- SendGrid: Opt for SendGrid if email deliverability and reliability are top priorities, and you need a user-friendly API for email integration. It's also suitable for businesses with a focus on branding and email personalization.
- Resend: Consider Resend if your primary concern is preventing emails from going to spam folders. It offers an easy setup and integration with Nodemailer for added control over email content.
Ultimately, the best choice depends on your project's specific requirements, development stack, and email marketing goals. You may also consider factors such as pricing, scalability, and the level of support provided by each service when making your decision.
Resources
Cover image by Stephen Phillips - Hostreviews.co.ukUnsplash
Increase icons created by IconLauk - Flaticon
https://blog.logrocket.com/streamline-email-creation-react-email/
https://resend.com/docs/introduction